pink quilt for a baby girl

This quilt is for a baby girl just a few weeks old. She is the granddaughter of my friend Joan. Last year when browsing on the net I saw this baby quilt at Craftbuds and I liked the design. Here my version :

pink baby quilt 1 - skalabara

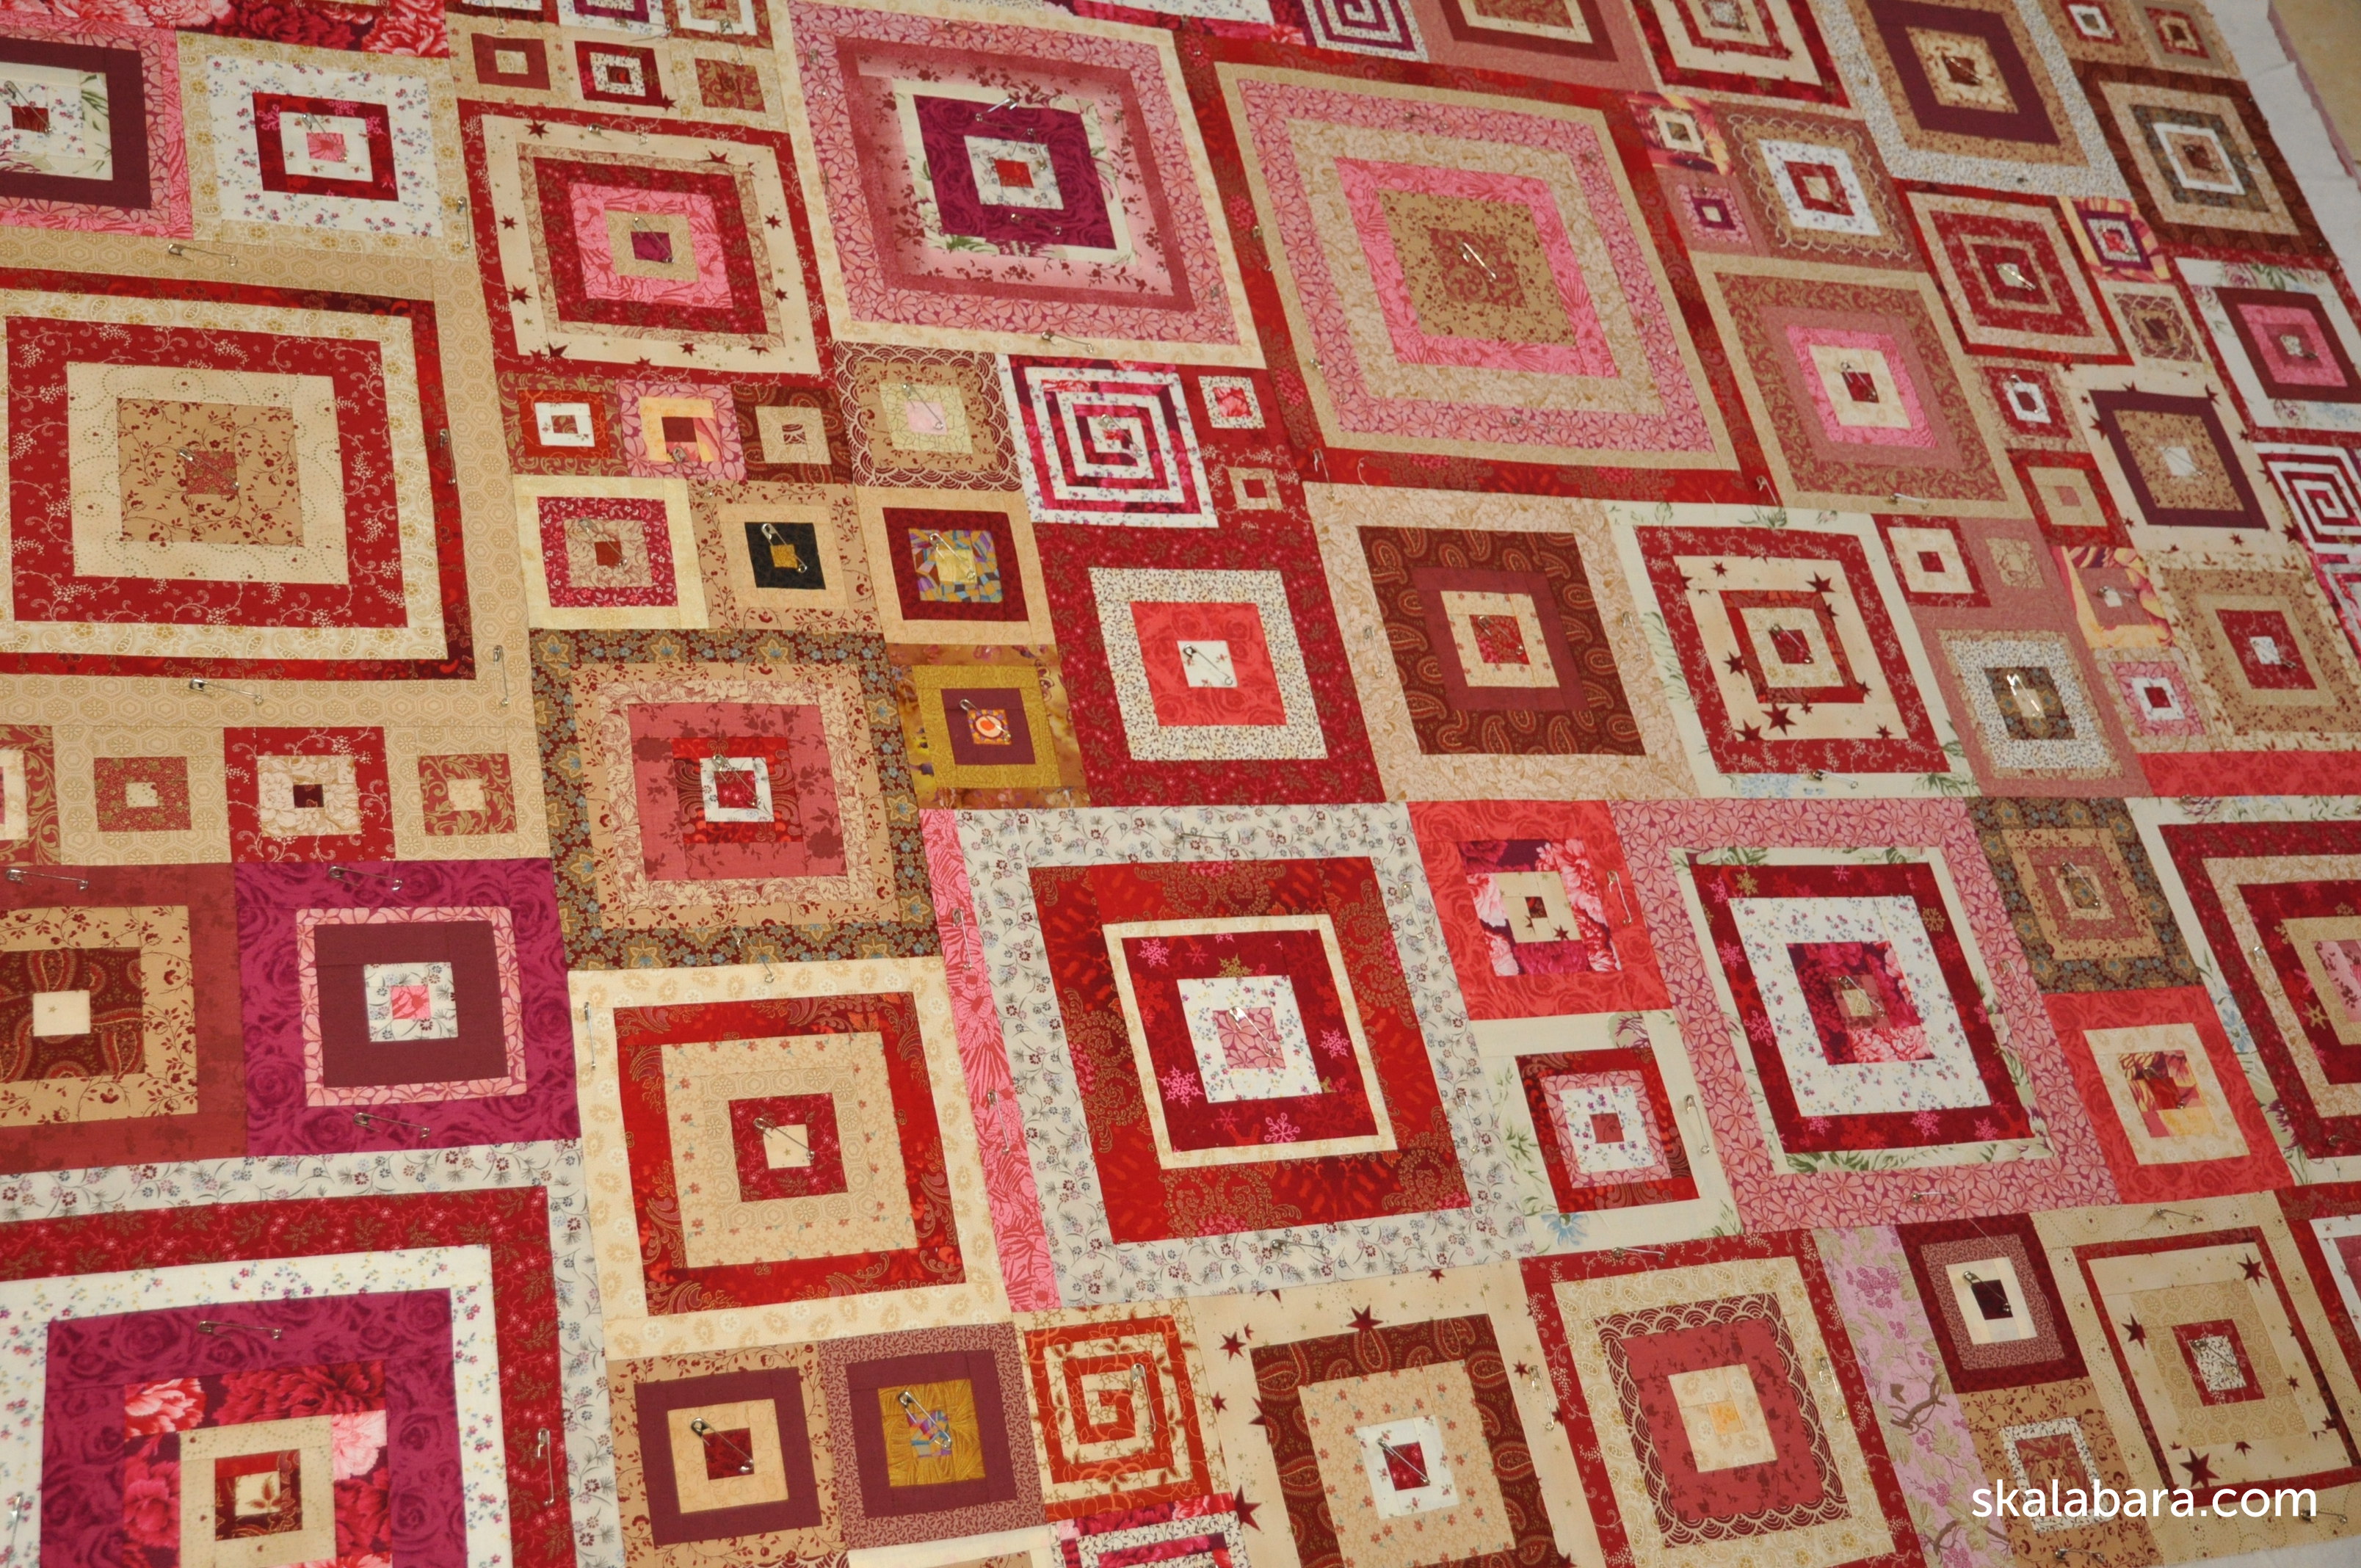
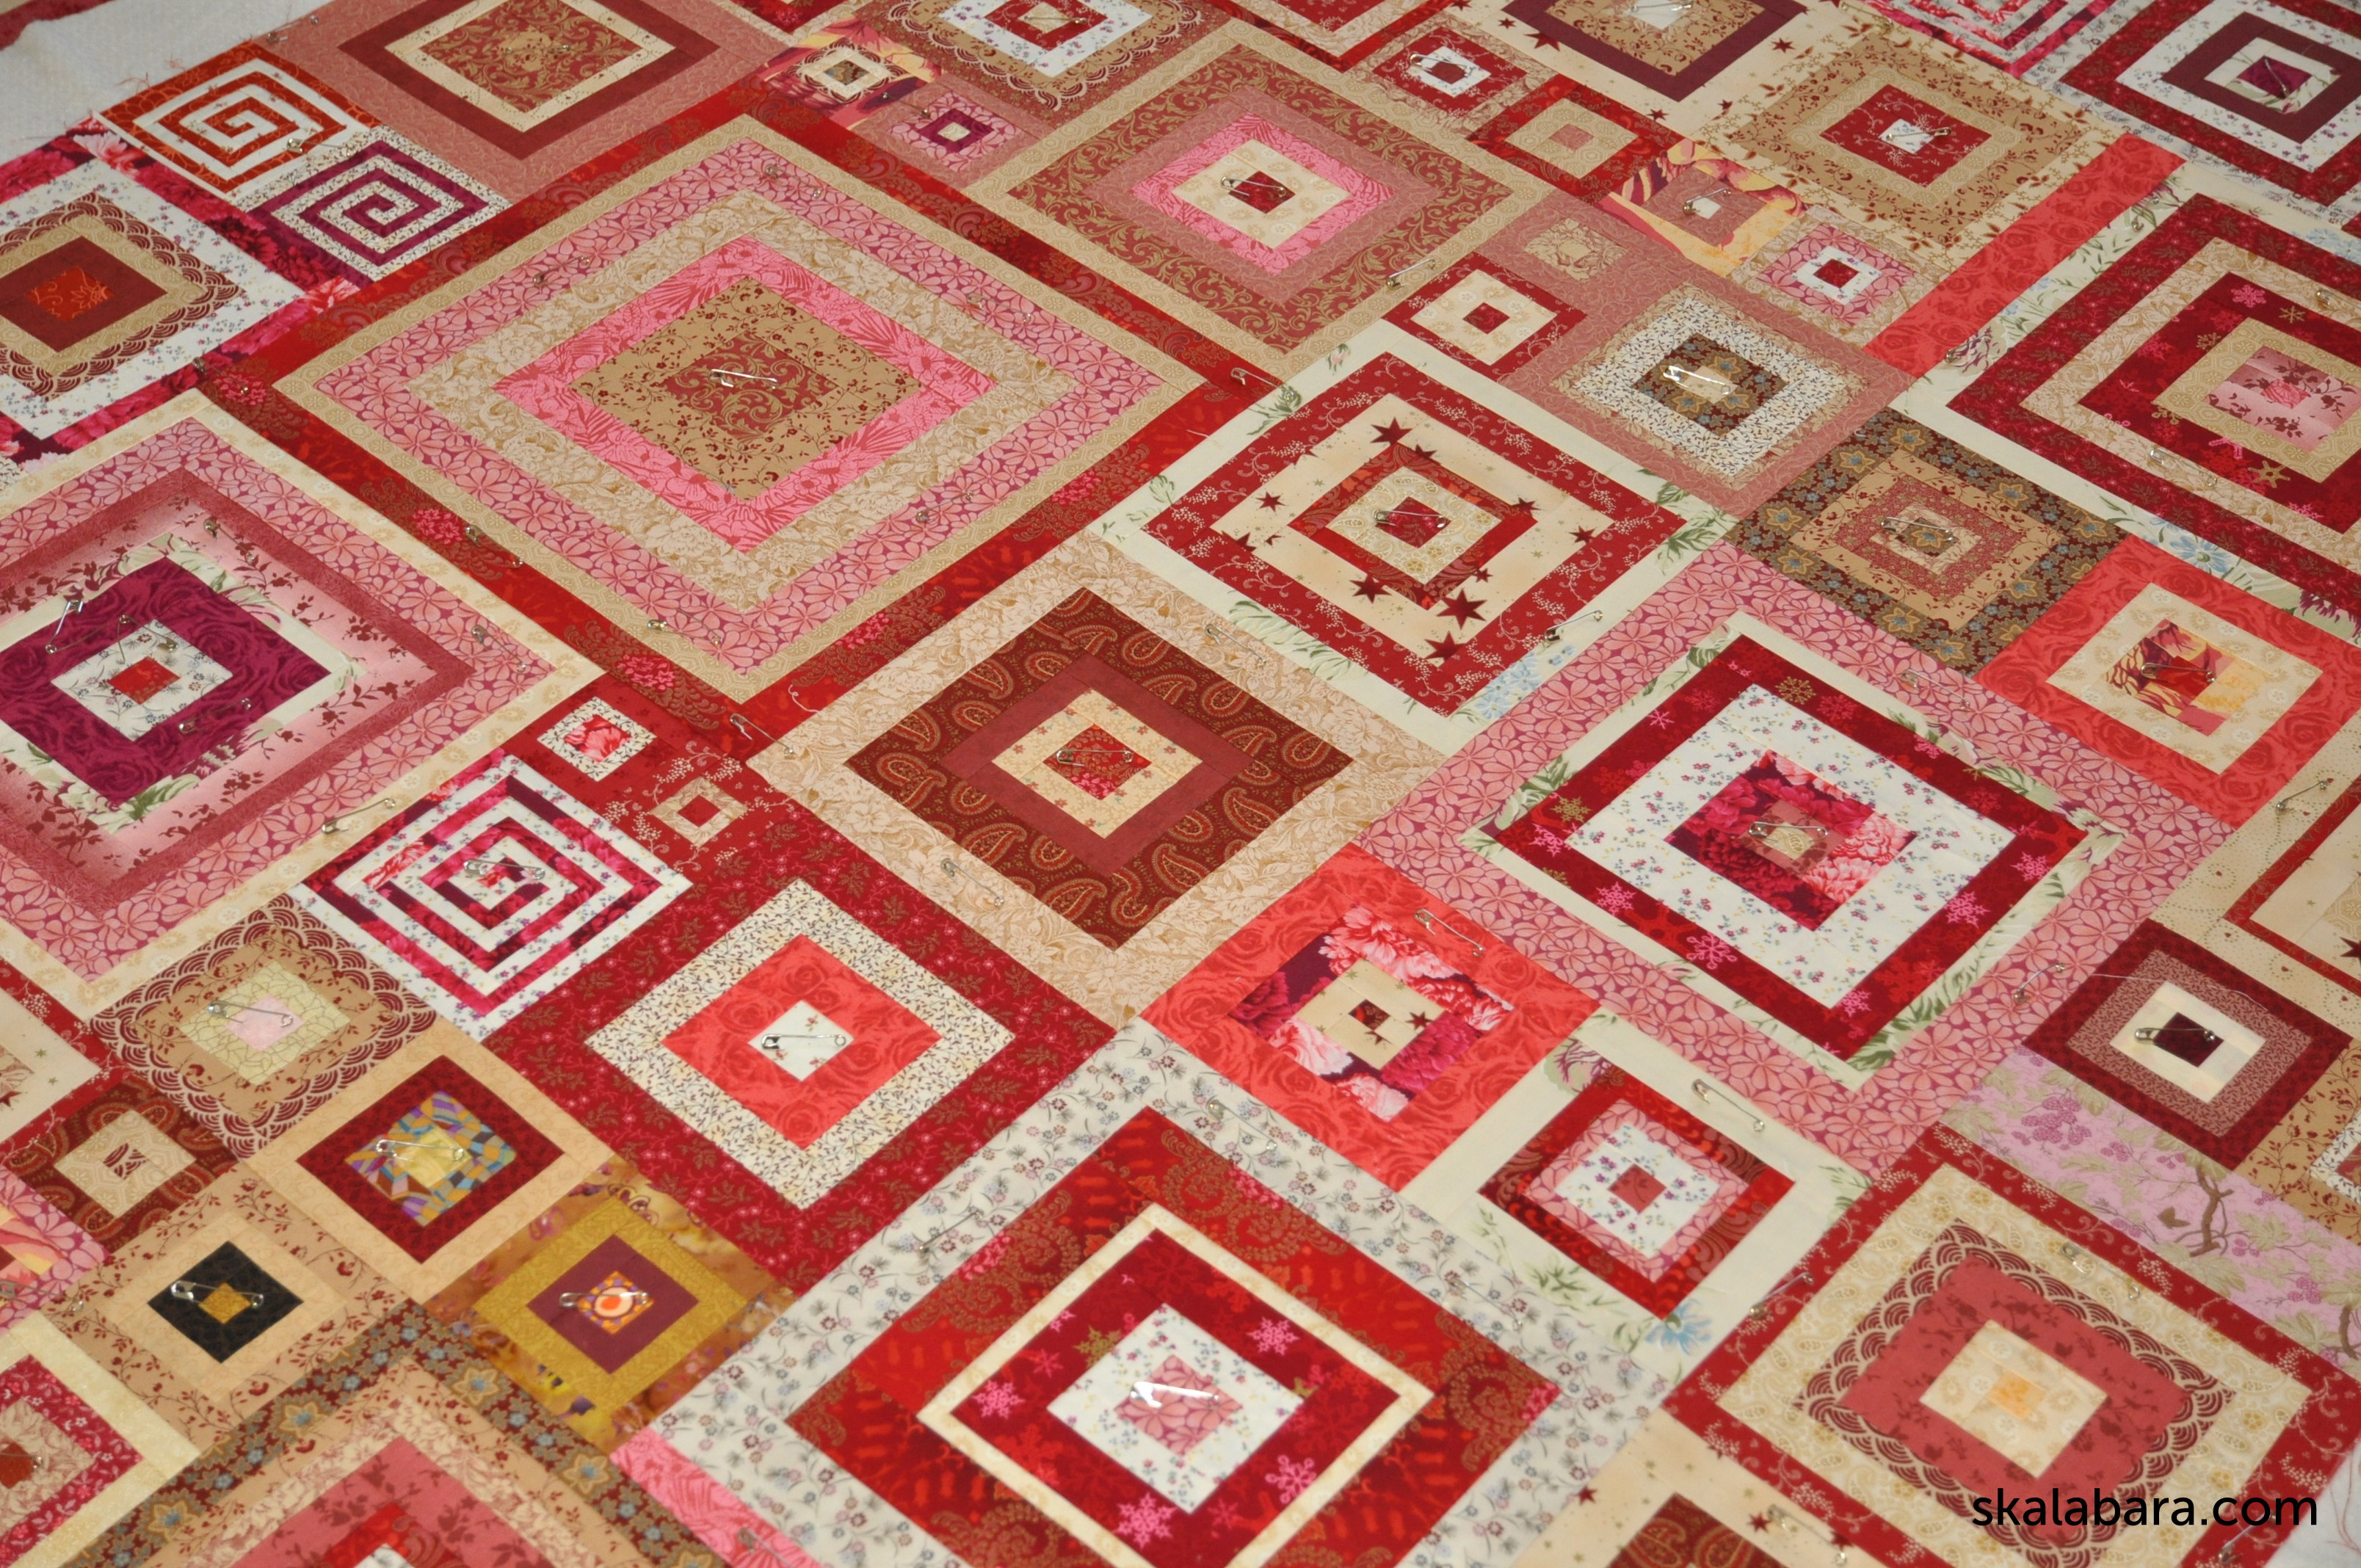
When Joan asked me to a make baby quilt, I remembered the Citrus and Mint Baby Quilt. So I got out my pink fabrics and started. When I made the first layout just with the pinks I thought it would be nice to get in also a touch of yellow. The quilt I made is larger than in the Craftbuds post. I have altogether 80 blocks instead of 42. The quilt is approx. a cot size. I have worked with the same cutting directions : 6,5″ squares as well as 2,5″ squares for the corners, but I used double of the material.

Some details of piecing and pinning :

pink baby quilt befor quilting - skalabara

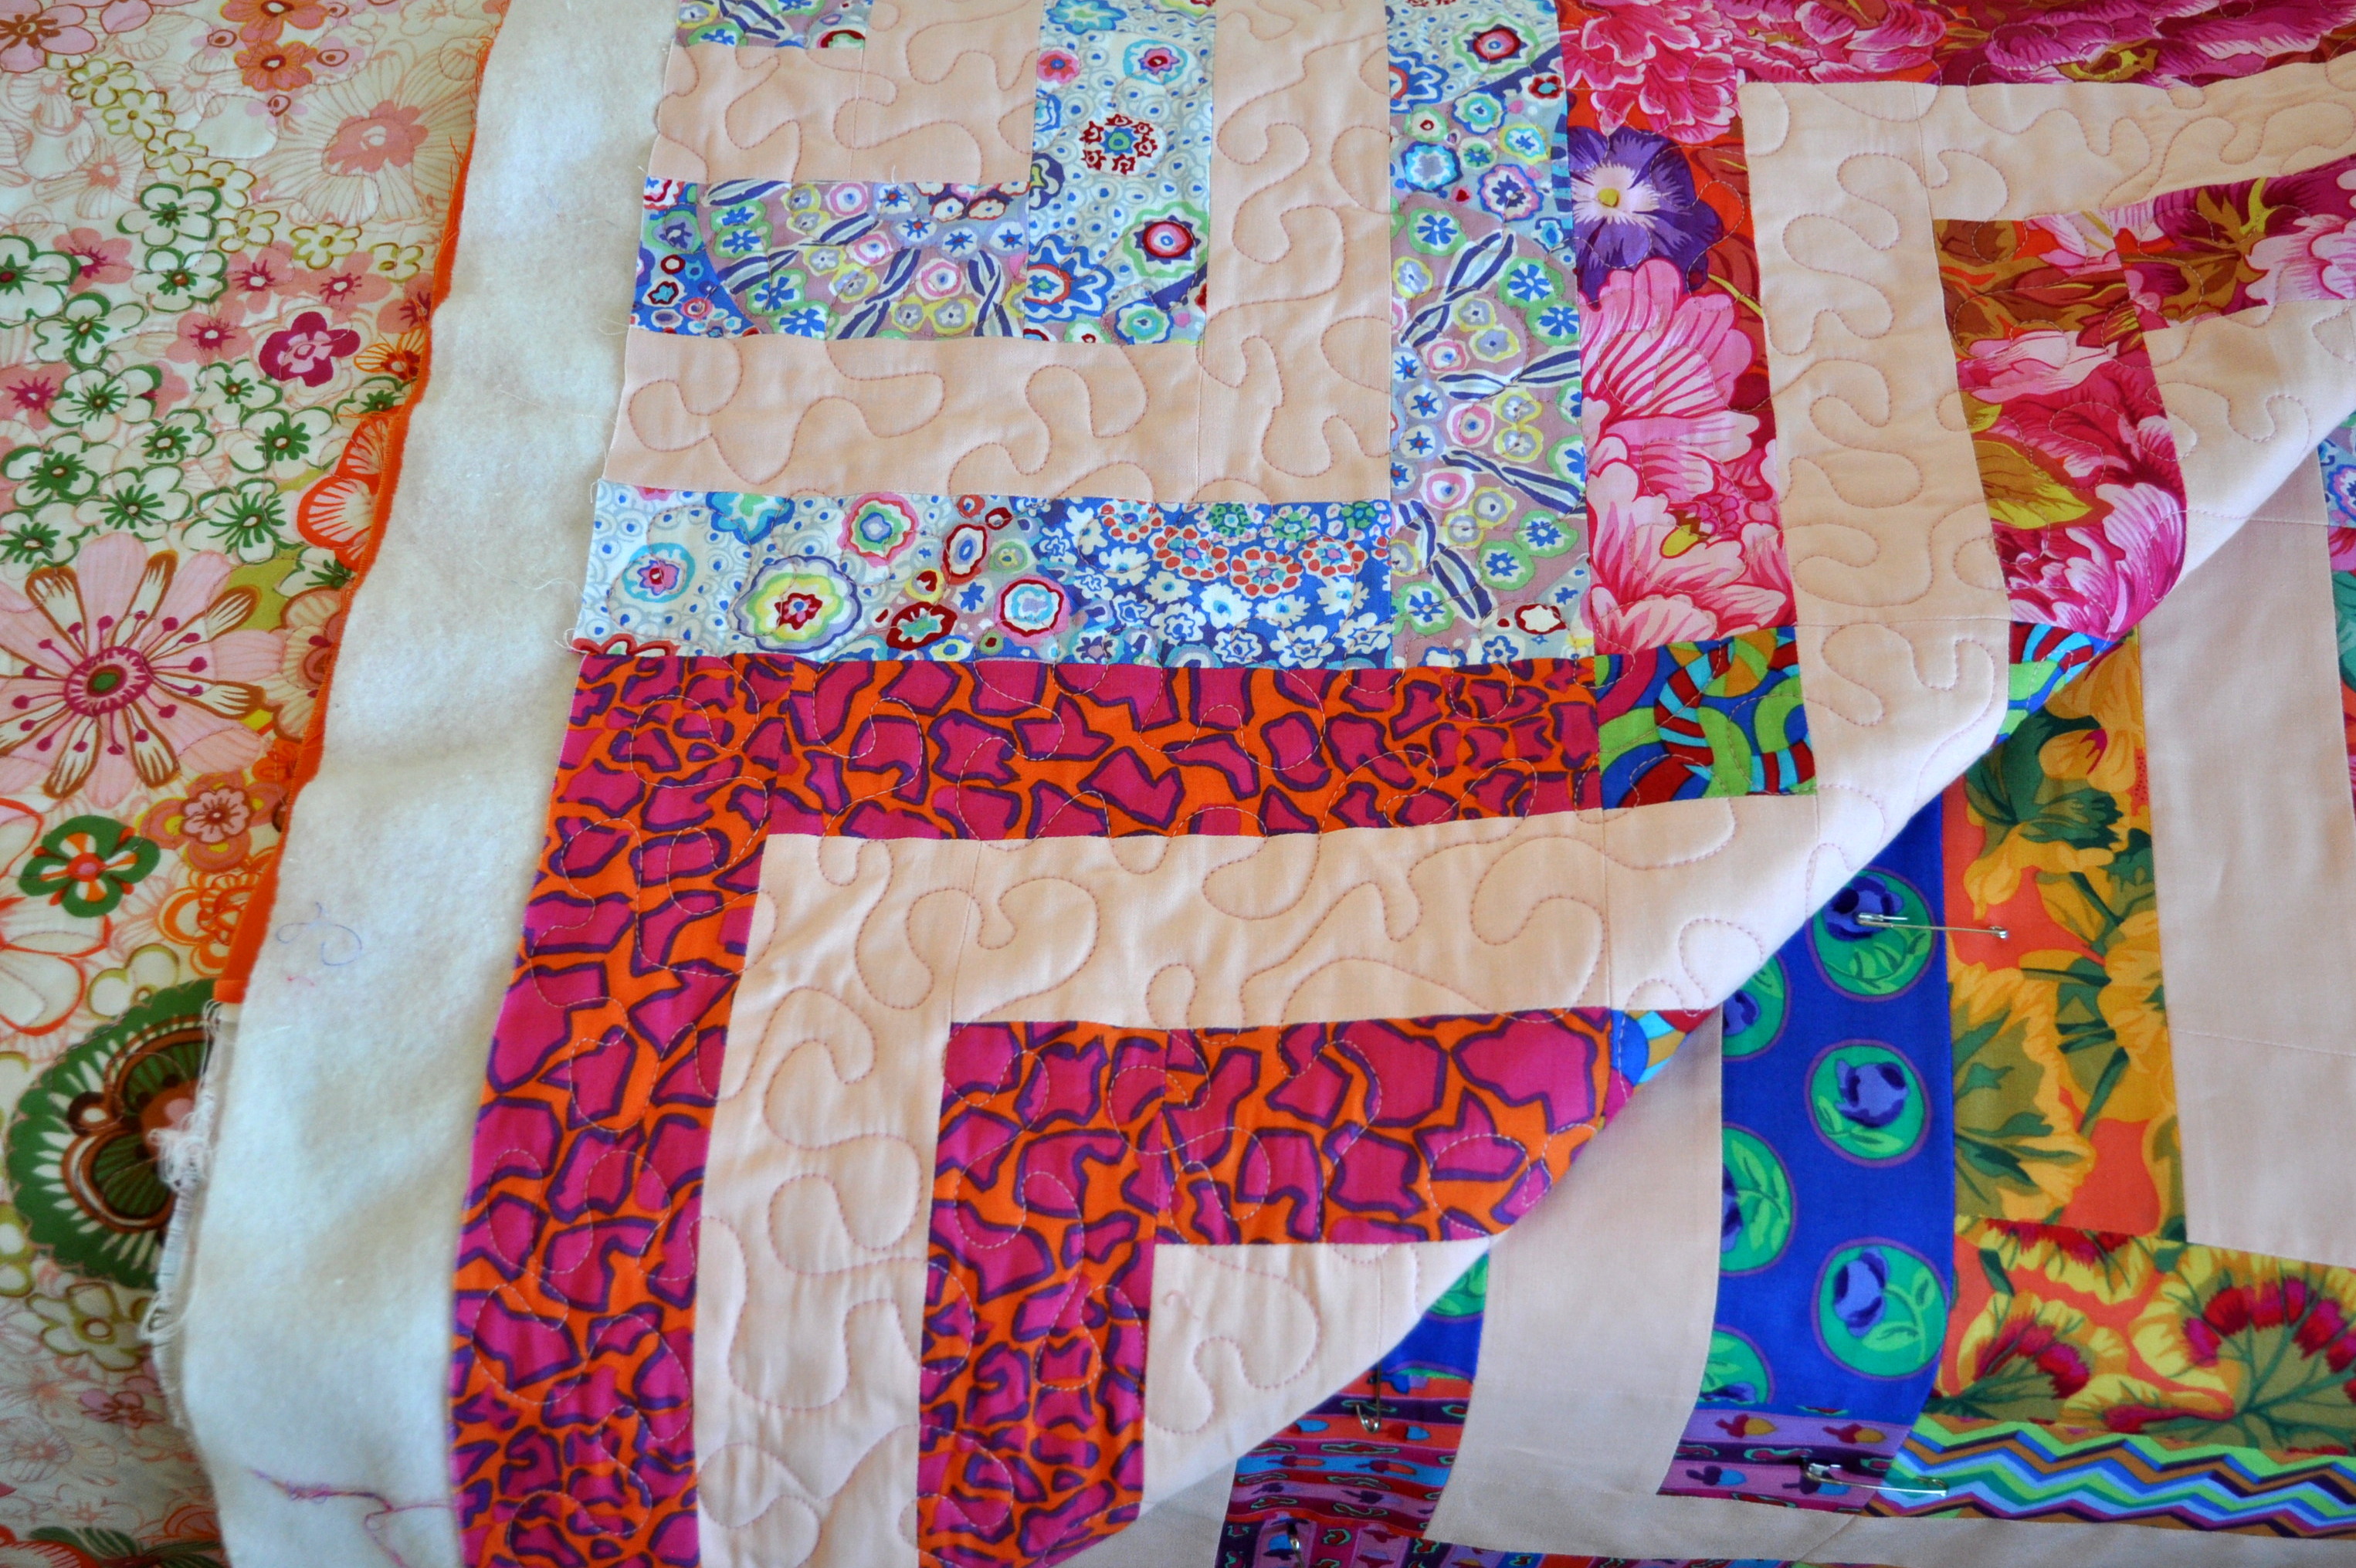
I decided to quilt it in free-motion with meanders as I do not want to get out of practice.

pink baby quilt detail - skalabara

Binding is in a light fuchsia shade.

pink baby quilt binding 1 - skalabara


pink baby quilt collage - skalabara

Pink Baby Quilt details

quilt size : 48″ x 60″ / 122 x 152 cm

wadding : Quilters Dream Cotton in select natural quality

quilting thread : Mettler Quilting No. 40, col. nat.-4

I shall be linking with Sew Fresh Quilts : Let’s Bee Social. Have wonderful Sunday and carry on quilting, Barbora

red UFO and my sewing room

As my last quilt “Picnic with Bella” was fun (and also quick) to quilt, I decided to have a look in the wardrobe and check those UFOs, i.e. unfinished objects = quilt tops. The first one I found was the Red UFO top, found the matching backing and made a quilt sandwich with basting pins.

red ufo 1 - skalabara. com

red ufo 2 - skalabara.com

This quilt top was sitting on the shelve at least for 4 years. I always loved the quilt design, but my color choice since then has changed very much. These were my beginner years without any knowledge about modern quilting, following the classical color combinations.

I started quilting on Thursday afternoon and today midday I finished the quilt with binding.  Once more I went for free-motion quilting with meanders. As the weather is warm and sunny, but very, very windy I could not take any pictures. I have cleaned up my sewing room and decided to take some photos here. My sewing room is half for me and quilting, and half for the books we have. My husband has a lot of fantasy novels and always has problems finding his favorite book as they are stacked in 2 rows.

sewing room 3 - skalabara.com

sewing room 2 - skalabara.com

sewing room 1 - skalabara.com

Above a close up with my flower photos which are developed on metallic photo paper and have incredible colors. The pair on the left ares my parents about 55 years ago. The 2 small children are my husband Helmut and his sister Waltraud about 65 years ago.

Tomorrow I shall have a day of from sewing, but never the less I can think about my next quilting projects!

Have a nice Sunday, Barbora

luxor throw basted and FMQ with meanders

Finally I had enough time to finish the quilt top, select the backing fabric, prepare the quilt sandwich and get down on my knees to do the pinning. You can’t really see the basting pins on the photo, but believe you me, they are there!!

luxor sandwich

Whilst walking the dog I did some thinking about how to finish this throw. Should I stick to the walking foot and follow the ziggy zaggy pattern or should I get out the quilting foot and do some FMQ? After considering all pros and cons with both techniques I decided to quilt with a meander pattern in FMQ. Looking through my “quilting thread stock” I picked up a light pink Mettler 40wt quilting thread. This the result of my quilting session this afternoon (a quarter done) :

luxor meanders

luxor back

More quilting tomorrow, and the day after tomorrow and the day after …. Anyway looking forward to do the binding.

Thanks for stopping, have a wonderful Sunday,

Barbora

floating colors #2 is ready for quilting

The summer has taken over a we had a few very hot days. Luckily the nights are still a bit cooler, so no need for air-conditioning through the night.

I have worked on my blocks for the MQG Challenge. I am nearly there, just need to do a few small alternations and think about block names.

My second and larger quilt “floating colors” is ready for quilting. This time also I want to combine straight line and free-motion quilting – like on “oh baby, baby #2“.

We are having the house interior painted. This puts the quilting back, but I can always do something on the computer or go a take a few photos of the flowers that are now full in blossom.

Happy quilting, B.

I’ve been listed in the Etsy Spring Lookbook 2012

Yesterday was my lucky day.

When I opened my emails in the morning there were 2 mails

  1. I’ve been listed in the Etsy Spring Lookbook 2012. please use this link to open the online version, my Etsy store Skala Bara is on page 74!
  2. I’ve been asked if I would be interested in participating in a project to help girls in Romania by sending a 8×8″ block. This is also something new for me and I looking forward to do it. Please find more information on this blog: www.callingallquilters.blogspot.com/

I’ve had also a check at the hospital and I am in total remission with my lymphoma. Thanks God, everything is OK 9 months after finishing with my chemo.

And last but not least – my hubby Helmut invited my for meal at our local Indian restaurant. And this means no cooking in the evening, hurrah, hurrah.

Here more info about the Rock Around the Clock Quilt or a quick tutorial how to make a sandwich:

  1. Spread the backing right side down on the floor. Tape it firmly to the floor (using strips of painter’s tape), the fabric is completely smooth. Remember : both backing and batting should be approx. 1″ bigger on each side than the quilt top.
  2. Detail of taping. I use the tile grouts as orientation lines for positioning the quilt backing and top.
  3. Spread the batting on top of the backing and smooth out any wrinkles.
  4. Spread the (well ironed)  top on the batting. Starting from the centre smooth out any wrinkles. Watch the correct alignment of the backing and top. this is your last chance for correction before pinning. I use curved safety pins, start from the centre and pin carefully through all 3 layers (backing, batting, quilt top). Once you have pinned the entire sandwich remove the tape, fold the sandwich and you can start quilting!

At the moment I am thinking about the quilting style for this special top. Should I go for free-motion quilting (with less experience) or for straight lines with a walking foot? Since I have not decided yet, I started a new project with the same wonderful batik fabrics, it is a HST Quilt.

More info next time, happy sewing

Barbora